bathroom remodel
Because of the limited space, remodeling a bathroom may be a challenging project. Bathroom renovations are tricky, so make sure you use a business that has a solid game plan and methodical approach. You'll need some familiarity with the mechanics of bathroom renovation to pull this off successfully.
When renovating their bathrooms, many homeowners have no idea what happens at each stage. Nonetheless, it's all for the best in the end. A well-executed renovation project, after all, may give any lavatory a new lease of life.
Bathroom renovations are more complicated per square foot than most other types of home improvement projects because of the large array of jobs that must be completed. Furthermore, they often differ greatly according on your specific options and tastes.
Many homeowners, for instance, would rather hire a single local bathroom remodeler to take care of everything from the initial design to the final touches on the project than a number of different contractors specializing in different areas of the renovation. The need to relocate barriers is also specific to some projects.
The bathroom remodeling process consists of a series of phases, the sequence of which will be determined by your unique project requirements. This manual's stated objective is to provide a flexible and functional bathroom renovation procedure that can be tailored to the specifics of each project.
Organizing Everything Is the First Step
Preparation is the key to a successful bathroom renovation. DIY projects need research on the cost of all necessary components.
It's important to shop around for remodeling estimates before committing to a company. Remember that even the simplest bathroom redesign can cost thousands of dollars, depending on the material you replace or add.
There is some leeway in the specific materials you select for this phase. Each designer should make their own design choices when they come up in the queue. You should, however, familiarize yourself with the various colour schemes used for different prices.
At this stage, a new floor plan must be developed if a different bathroom arrangement is desired. Knowing the current plumbing and electrical setup as well as the desired setup is crucial. That way, the electricians and plumbers can give you precise price quotes.
To save money on things like fixtures, paint, and lighting, consult with the professionals you hire to remodel your bathroom to see if they can help you score any deals. Many of them may get their hands on low-priced wholesale goods and clearance products from warehouses. That might end up saving you a significant amount of money on your bathroom makeover.
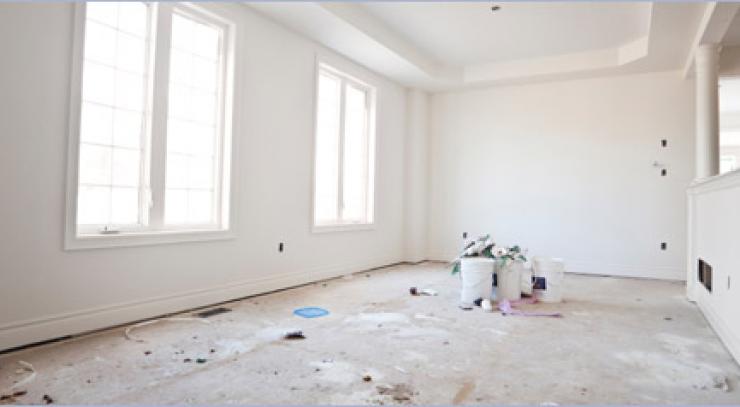
The Second Step Is to Tear Down Your Current Bathroom
The demolition phase of a bathroom renovation is often seen as the most thrilling portion of the project. However, diving in without preparation is a recipe for disaster.
You should first turn off the lights and turn off the water to the sink, shower, and bathtub in that room. Avoid breaking something you know you'll need in the future.
It is important to be mindful of the plumbing and wiring underneath the wall tile when you remove it. It's important to inspect for water damage and the growth of mold or mildew behind the toilet and sink before you rip them out. Towel racks, baseboards, and light fittings should all be taken down.
Third, modify the plumbing.
After you've exposed every inch of your bathroom, you can begin installing the plumbing for your new fixtures. It's time to have a new tub or shower and a new flange for the toilet.
Either update the shower's controls or run an additional water line to support two shower heads. Take care of any plumbing adjustments that must be made in order to add another sink to a double vanity or to reduce vanities to a single sink.
Finalize the Electrical Work (4th Stage)
With the walls out of the way, it should be considerably easier to redo the electrical wiring in the bathroom. You may upgrade the 15-amp circuit to a 20-amp one. That will make your usage of washroom gadgets like hair dryers far more effective.
Additional switches and outlets can be added, or existing ones rearranged. The installation of GFCI receptacles, for instance, might be helpful for electrical outlets situated in damp environments, such as beside a pool or a sink. This will make your new vanity set up much more smoothly.
The fifth step is to put up the blocking for the grip bars.
Now that you have access to the studs in your bathroom walls, you may have blocking installed in that space. Your grip bars will be more sturdy if you do that. There are other options if you don't want to include them in the new bathroom design. Investing in sturdy material to fasten these fixtures to the bath tub, shower enclosure, and lavatory walls can save time in the long run.
Phase 6: Wall Protection
Then, place a vapor barrier and cement board in the damp regions of the tub or shower enclosure.
It's common knowledge that cement boards are exceptionally water-proof. They're strong enough to hold your wall tile in place. Drywall is another option for the other walls.
Seventh, start really painting.
To get the best results, use a satin or semi-gloss sheen for interior painting. These hold up well to the constant humidity of a bathroom.
Tile, vanity, sink, bathtub, and toilet installation should wait until after painting is completed. Doing so will lessen the likelihood that paint will get on your new flooring or fittings.
Install Tiles (Step 8)
Putting in new tile is the next step in your bathroom makeover. Start your bathroom renovation by tiling the shower or tub surround. Tile the floor once you've finished the walls.
In addition, you may use grout on each of them, but you must caulk the edges. Grout is available in many different hues. You may use it to complement the look of your bathroom, or you can include it into the décor.
Fix the shower's door in place, as the ninth step
The shower enclosure's track, rod, and door can be placed after the tile has been laid during a bathroom makeover. When redecorating your bathroom, it's important to select a shower door that complements the new design scheme.
Tenth, set up the ventilation fan and lighting.
The time has come to install the ceiling and wall lights. After that, you should focus on installing the exhaust fan in the right way.
To complete the process, proceed to Step 11.
The vanity and sink may be shifted to their proper locations. Next, you'll need to attach the piping to the new fittings. One of the most exciting parts of remodeling a bathroom is finally getting to put in a new toilet.
It is, in reality, one of the simplest parts of your overall plan. You can save money by doing this step yourself if you're feeling competent enough to do it. After you've finished the rest of the demolition and construction in your bathroom, it's time to install the finishing touches, such as light switch plates, shelves, towel bars, and anything else you'll need to make the room functional.