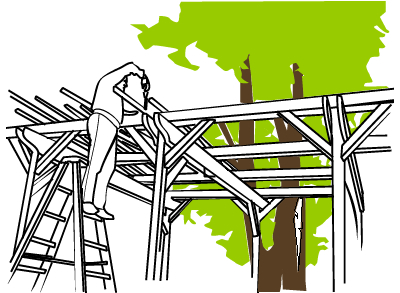
Constructing a pergola doesn't have to be difficult, but like most things of this nature, if it's not done the right way from the outset it's likely to cost you more time, effort and money than is necessary. Below is a basic idea of how the process should work, from start to finish:
Choose a design and create a plan
The first step is to get your plans drawn up. Whether this is done yourself or by a designer or structural engineer, you will need to have a side view and top down view at a minimum, with additional angles being helpful for irregularly shaped pergolas. The plan will be what you present to the council to obtain your permit, so it must be accurate and structurally sound with all measurements (including stresses and reinforcements) accounted for precisely. It will also allow you to determine exactly what you are going to need in the way of materials.
If you are planning on building an open roofed pergola, it is better to plan it as if it had the weight of a roof on it. This gives you the option of adding one later without having to make any major structural changes.
Construction of the pergola
The first step in the construction of a pergola is to prepare the site. This means ensuring that there's adequate drainage, understanding how reactive the soil is, removing things like tree stumps or roots, and if necessary, applying some termiticide to the surrounding area.
Next, the footings need to be installed. A decision has to be made as to whether to concrete in the posts and give them time to dry and cure adequately before continuing with the construction, or to use temporary posts to brace the beams and then fill in the posts permanently later. This applies whether you are concreting in the posts directly or using steel stirrups. Many builders prefer to use temporary posts while constructing pergolas, as this allows them to better gauge the length the posts need to be once the beams are up, and wastes no time in waiting for the concrete to harden.
After the beams have been erected and attached to the house where necessary, the rafters which make up the roof of the pergola are laid onto the beams and firmly secured. If you are including battens, these are laid down on top of the rafters. The closer the spaces between your battens, the more shade they will offer from the sun.
Painting and staining the pergola
Once the structure has been completed, it's time to apply your paints or stains to the wood. Make sure that the surfaces you’re coating are smooth and clean; any dust on the wood or rough parts may make the application uneven and ruin the look you’re going for. Give the wood a sanding if necessary and make sure it’s had a good brush down before starting.
For paint, remember to apply a primer coat first to give the second and subsequent coats a decent base to adhere to. When staining, apply some to a little bit to a wood offcut first and allow it to dry so you can see exactly what colouration you’re going to get in the end. Regardless of whether you're staining or painting, you will need to account for the weather so make sure all exposed wood has been adequately covered.
Covering or cladding your pergola's roof
If you are planning on having a covered roof, now is the time to apply this. Whether it be in the form of shade cloth stretched over the top and fixed to the rafters or laying down steel cladding, once the roof is on, your pergola is complete. Make sure that any areas intended for full rain cover are properly waterproofed and that all gaps are properly sealed.